When it comes to protecting your home, the roof stands as the first line of defense against the elements. Whether it’s rain, snow, extreme heat, or high winds, the roofing system is constantly under attack from nature. Therefore, ensuring that your roof is adequately weatherproofed is crucial to maintaining the integrity of your home and preventing costly repairs. Weatherproofing is not only about enhancing the roof’s ability to resist moisture and other natural forces, but it’s also about improving energy efficiency, increasing the roof’s lifespan, and protecting the overall structure of your home.
In this article, we will take you through a comprehensive step-by-step guide on how to master the art of weatherproofing your roof. From preparing the surface to choosing the right materials, each step is designed to help you achieve a roof that can withstand the elements and provide long-lasting protection.
Step 1: Inspect the Roof and Identify Vulnerabilities
Before you can weatherproof your roof, you need to understand its current condition. Start by inspecting your roof for any visible damage, including cracked shingles, broken tiles, missing flashing, or rusted areas. Pay attention to areas that are particularly susceptible to water infiltration, such as valleys, chimneys, skylights, and roof vents. These are common problem areas that may need additional attention.
Additionally, inspect the attic and ceilings for signs of leaks or moisture damage. Water stains, mold, or a damp smell can all indicate a problem with your roof’s weatherproofing. If you are not comfortable doing a full roof inspection yourself, it’s worth hiring a professional roofer who can provide a more detailed assessment.
Step 2: Clean the Roof Surface
Once the inspection is complete and any damaged areas are noted, the next step is cleaning your roof. Over time, dirt, moss, leaves, and other debris can accumulate on the roof, potentially blocking drainage systems and allowing moisture to pool in vulnerable areas. Not only does this debris reduce the effectiveness of weatherproofing materials, but it also creates the perfect environment for the growth of mold and algae.
Use a soft-bristle brush or a pressure washer to remove dirt, debris, and moss from the roof’s surface. Be careful when using a pressure washer, as high pressure can damage shingles and other roofing materials. Focus on removing organic matter and ensuring that the roof surface is clear before moving on to the next steps.
Step 3: Replace Damaged or Worn Roof Components
After the roof is cleaned, it’s time to address any areas that need repair. If you find cracked or missing shingles, tiles, or roofing panels, they should be replaced promptly. Any damaged flashing, which helps seal the joints and intersections of the roof, should also be repaired or replaced. Flashing that is corroded, bent, or missing altogether will create gaps through which water can seep.
If your roof has any exposed nails or screws, be sure to replace or reseal them to prevent leaks. Many roofing materials come with specific instructions on how to secure them properly, so make sure to follow the manufacturer’s recommendations for the best results.
Step 4: Apply a Weatherproofing Underlayment
One of the most effective ways to weatherproof your roof is to install a high-quality underlayment. Underlayment is a protective layer that sits between the roofing material and the roof deck, providing an extra barrier against water infiltration, ice dams, and extreme temperatures.
There are different types of underlayment materials to consider:
-
Felt Underlayment: Traditional roofing felt is one of the most commonly used underlayments. It is made of fiberglass or organic materials and is coated with asphalt to make it waterproof. Felt is an affordable and reliable option but may not offer as much durability as synthetic alternatives.
-
Synthetic Underlayment: Synthetic underlayments are made from polymer-based materials, providing enhanced durability and water resistance. They are generally more resistant to tearing and weathering, making them a popular choice for homeowners seeking long-lasting weatherproofing.
-
Ice and Water Shield: In areas prone to freezing temperatures, an ice and water shield is an essential underlayment. It’s a self-adhesive membrane that seals around roof penetrations like vents, chimneys, and skylights to prevent water from seeping under the shingles.
Installing underlayment is a critical step in creating a weather-resistant roof. Depending on the type of underlayment you choose, it can significantly improve the roof’s ability to repel water and withstand extreme weather conditions.
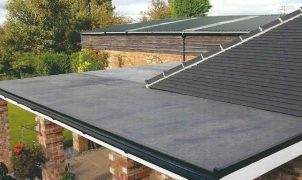
Step 5: Choose the Right Roofing Material
Once the roof deck is prepped and the underlayment is in place, it’s time to select the roofing material. The type of material you choose will impact the roof’s ability to weatherproof your home effectively. Common roofing materials include asphalt shingles, metal roofing, clay or concrete tiles, and slate.
-
Asphalt Shingles: These are the most common roofing material in the United States due to their affordability and ease of installation. High-quality asphalt shingles with weather-resistant coatings, such as those with algae-resistant properties, can enhance your roof’s ability to stand up to the elements.
-
Metal Roofing: Metal roofs are gaining popularity for their durability and energy efficiency. They are highly resistant to wind, rain, and snow, and they can reflect heat in warm climates, which helps maintain a more comfortable interior temperature.
-
Clay and Concrete Tiles: These roofing materials are often used in warmer climates and are known for their durability and aesthetic appeal. They are naturally weather-resistant and can help keep homes cool in the summer.
-
Slate Roofing: Slate is an extremely durable, long-lasting material that is naturally weatherproof. While it can be expensive, slate roofs provide excellent protection against rain, snow, and high winds.
When choosing a roofing material, it’s important to consider your local climate, the overall aesthetic of your home, and your budget. A professional roofer can guide you toward the best option for your specific needs.
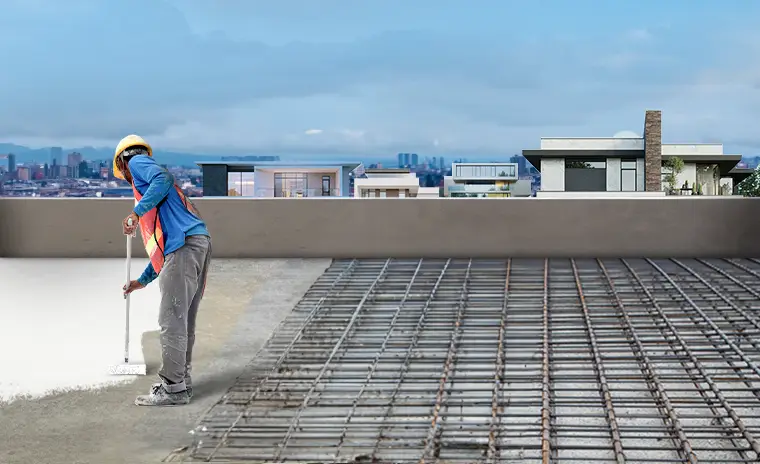
Step 6: Install the Roofing System
With all the necessary preparations made, it’s time to install the roofing system. Proper installation is critical to ensuring the roof performs as expected. Whether you’re installing asphalt shingles, metal panels, or tiles, following manufacturer guidelines and best practices is essential for creating a weatherproof barrier.
Ensure that shingles or tiles are properly overlapped and sealed to prevent water from seeping through gaps. For metal roofing, make sure that the panels are securely fastened and the seams are sealed to prevent leaks. Pay close attention to flashing around roof penetrations, such as chimneys, vents, and skylights, as these areas are often the most vulnerable to water intrusion.
Step 7: Regular Maintenance and Inspection
Weatherproofing your roof is not a one-time task; it requires regular maintenance to ensure that the roof continues to perform well over the years. Periodically inspect your roof for signs of damage, wear, or debris accumulation. Keep gutters and downspouts clear to allow water to flow freely and avoid blockages that can lead to water pooling on the roof.
If you live in an area prone to extreme weather, such as high winds or heavy snow, consider having a professional roofing contractor inspect your roof annually. Proactive maintenance is key to prolonging the life of your roof and keeping it weatherproofed throughout its lifespan.
Conclusion
Mastering weatherproofing for your roof is a crucial step in protecting your home from the elements. By following this step-by-step guide—starting with a thorough inspection, cleaning, and repairing damaged areas, then installing a robust underlayment and selecting the right roofing material—you can ensure your roof is well-equipped to handle the weather for years to come.
Weatherproofing is an investment that not only safeguards your home but also improves its energy efficiency and overall value. Taking the time to properly weatherproof your roof today will provide peace of mind and long-term protection for your home tomorrow. Whether you’re tackling the project yourself or hiring professionals, ensuring your roof is weatherproofed is one of the most effective ways to safeguard your home from the unpredictable forces of nature.